H3 is the third exam period at my school, functioning as a pre-exam to the final exam. We are required to make one advanced product, required to be in line with our field of focus. Besides that, a smaller report showing construction and adjustments follows along.
I decided to make a classic lounge jacket for my H3 exam. With the leftover time I have, I will be making a vest and a pair of trousers. However, how far I will get is unknown, as we also got other subjects, which take up a substantial amount of time when combined.
The lounge jacket is a classic 3-button suit, wide lapel and back vent. I am aiming for the 1900’s style suit, therefor the jacket is a bit longer compared to most modern jackets. I like having a more open front, with what I call a blade opening.
The first day was spent drafting. As I do not have a lot of experience with the Kunieda system yet, drafting took a bit longer than expected. I suspected that there were a few mistakes in the measuring of the jacket and drafting of the trousers, something that would later be confirmed and corrected!
The trousers sit at the waist of the client, with a sway up on the backside, so when he sits down, his vest will be sure to not show his shirt. I noted that the middle seam seemed quite long, however that is compared to me, a person with a short torso, so proportionally his pattern is quite normal in that regard.
The vest is a classic British style vest, measured to sit a bit below the waist of the client. The lenght of the vest is determined by a measure, rather than the suit pattern, as I see the vest as an independent piece from the jacket.The back will be made of lining.
The jacket is, as mentioned, measured to be longer than most modern jackets.
For the shape of the jacket, I aimed for a more curved design, with a more “aggressive” looking waist, without giving it a bell shape. To help with this, both the side and the darts are properply rounded.
The second day was spent cutting the fabric and marking stitches. As the client is quite tall, I had to figure out how to cut down the fabric use. I have been informed that the standard fabric amount of Danish persons is around 3,5 meters. Given he is also getting a vest, and that the trousers are at the waist, the use of 4,1 meters of fabric is acceptable.
The third day was spent hand sewing the garments together. Using a weaker cotton thread, temporary stitches are made to get an idea of the general fitting. I have made sure that there is plenty of extra fabric, in case larger changes are needed for the garment. It is now ready for the first fitting.
I once heard an old saying amongst some tailors. “One day for drafting, one day for cutting and one day for sewing”. I never understood what garment it was for, but now I understand that it applies to a three-piece suit perhaps! I am quite satisfied with my progress.
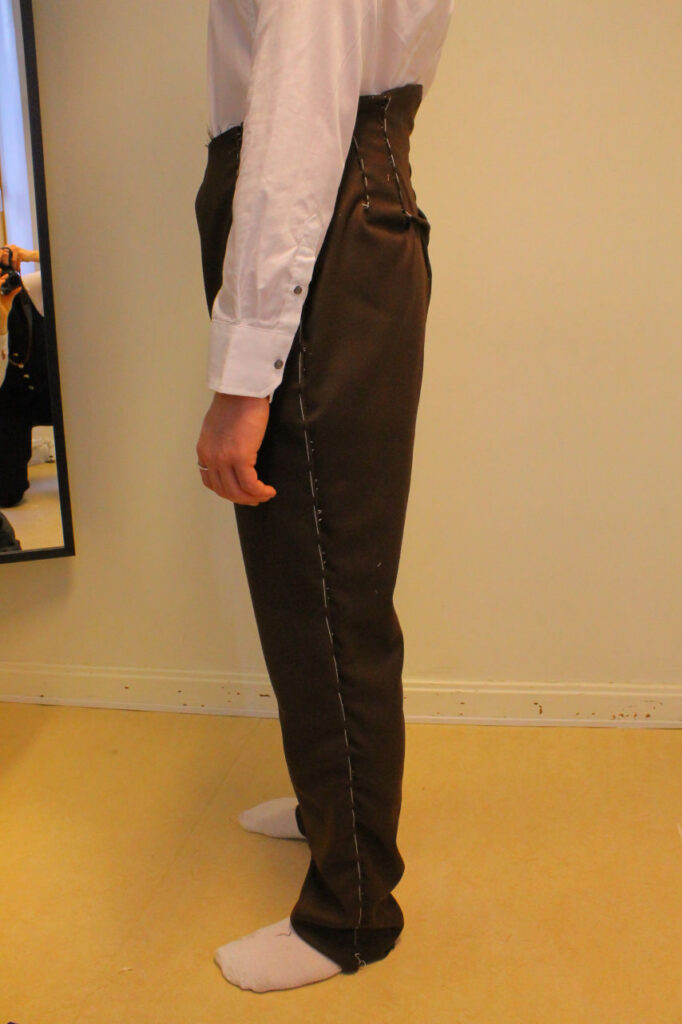
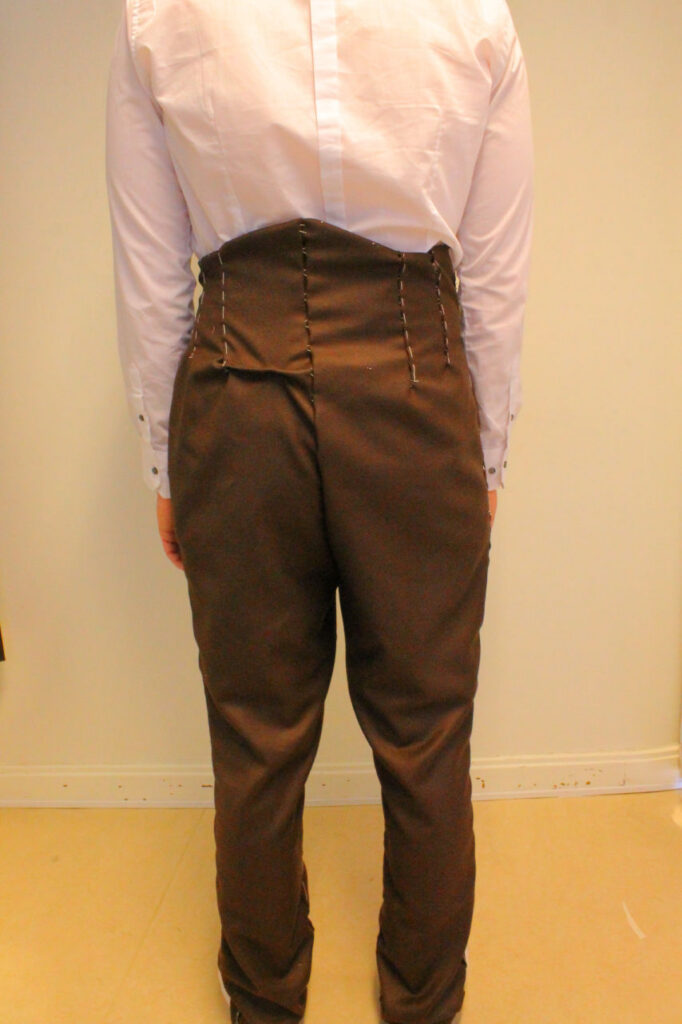
For the first trouser fitting, it was noted that on a front side, a crest formed, going from the crotch to the top side seam (below the waist). The backside had no such problem, indicating that the tightness was located on the front trouser panel and didn’t spread to the backside. This was confirmed once I noticed that I had made a mistake in drafting the front panel. By moving the front panel out of the side, and giving it around a centimeter more on the front seam, the problem dissapeared.
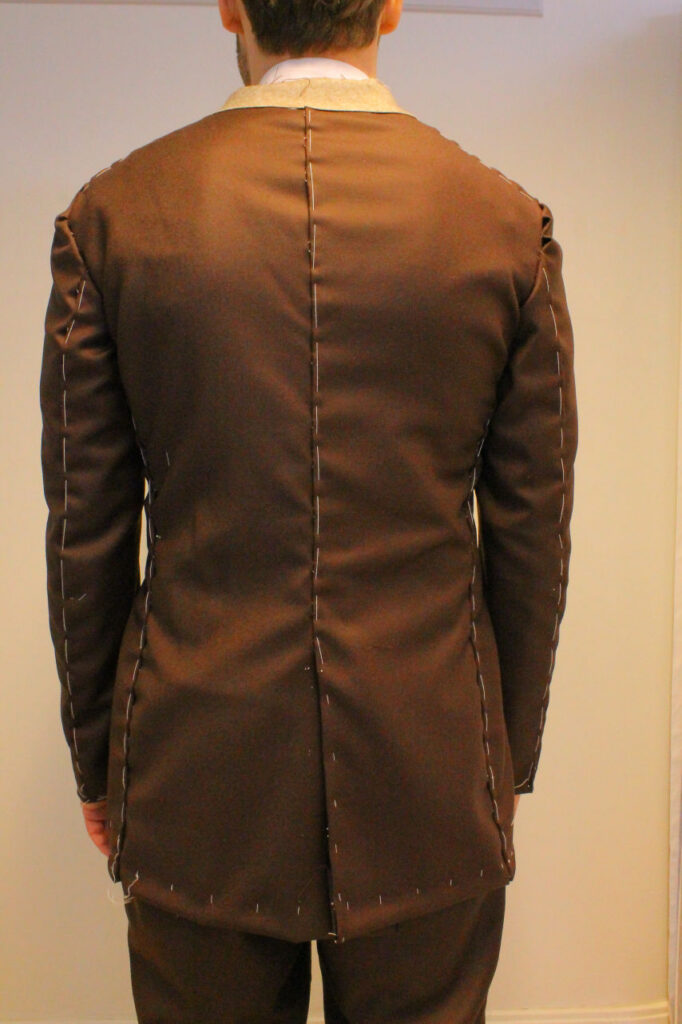
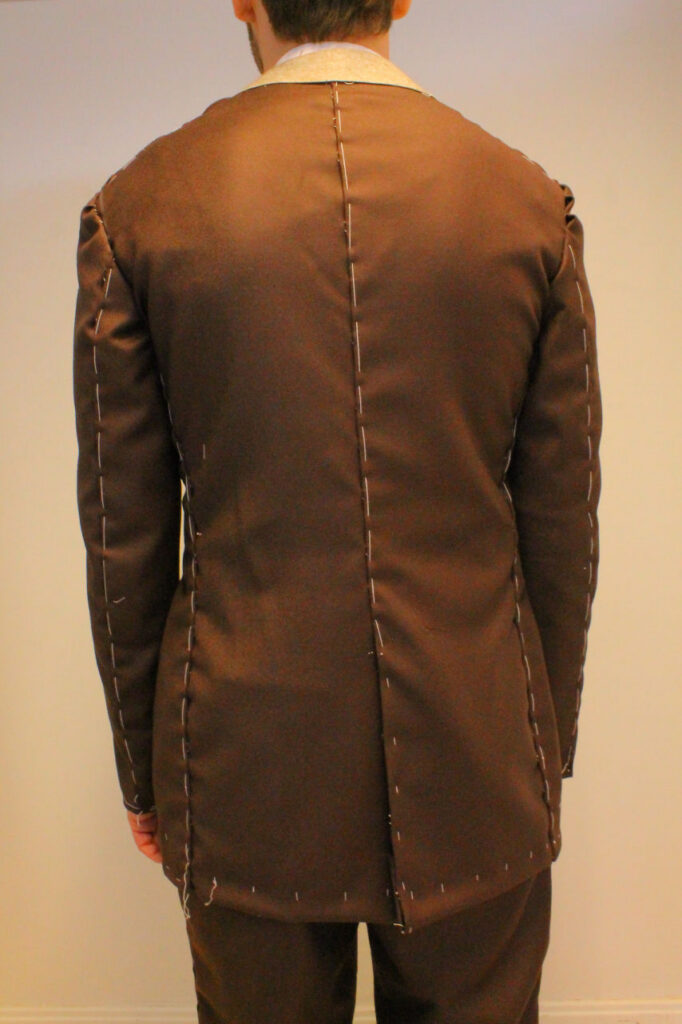
At the second fitting, it was noted that there was a general downwards pull along the sideseam on the entire back-panel. Combined with a sagging back-curve, it indicated that the back-seam was too long. By removing a bit of fabric around the seat, I was able to fix this issue. In practice, I will be able to shape-press the fabric (making it more or less curved), and in a worst-case scenario, where such is not possible, I would be able to make the correction on my pattern and re-draw it on the already cut pattern, since I have plenty of extra fabric.
In regards to my construction errors, there are two major causes. First of all, I have a lack of experience in this system, so for the width of the front side, I accidentally used a fixed number instead of the variable that it is inevitably based on (a quarter of the seat). For the back seam, since there was so much lenght to be removed, it would not be a solution to simply move it up into the waist.
Overall, the back curve is too angled. I misremembered the figure of the model, and accidentally thought his seat more full than reality. A general rule of thumb is that the fuller the seat, the more angle is required. Normally I would do a complete figure analysis while measuring, however this time I made a mistake and did it improperly, leading to this issue.
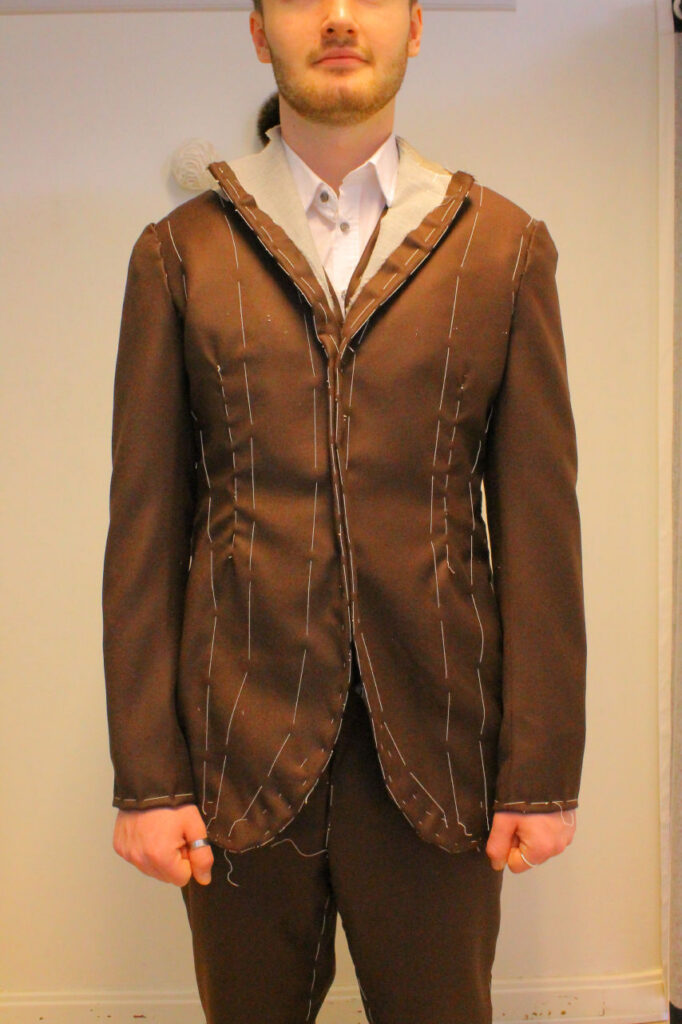
Some persons might note that the back thigh has too much space, however this is only in comparison to modern trousers. Most modern trousers are quite slim on the backside, the issues caused by this would be elastics and less requirement for movement. However given that this suit is more for regular use, and that the fabric does not have the elastic ability, making the trousers like traditional trousers was deemed neccesary, and is a standard for me, as I put function as a priority, if the costumer does not have a specific requirement of tightness.
It should be noted that a mistake was made during the drafting of the vest, where the vest was not made wide enough. Before the fitting, we decided to give it plenty of extra space in the sides, so we could properly see the fit.
During the first fitting, it was found that the front side needed a bit more, it was decided to give 2cm extra from each side, functioning as the overlayed area, and then it could be further fitted at the second fitting. Besides that, the front opening was too long, with up to 3cm needing to be removed. Normally this could just be moved up into the shoulder, however due to the amount, it was decided to press shape into the front. The back also needed a bit at the bottom.
For the second fitting, the front was corrected, a bit more was needed at the bottom and a little was to be taken off the front. Due to his larger shoulderblades, it was decided to give a bit extra lenght to the back overall, with the dart being moved to where the shape was needed. Some fabric would be removed from the armhole through the dart, so it wouldn’t stand out.